If you have ever worked with Vendor Central, you know that adding products and editing content hasn't always been a walk in the park. In comparison to a Seller Central NIS, Vendor Central was more complicated; it required you to fill in many more fields before it was accepted, you could only upload a Vendor NIS one time (if you had an error, you needed to re-download and fill out a new NIS), and making any changes to your content so that it appeared live on the Amazon website usually required opening a case with Vendor Central support.
Thanks to Vendor Central updates over the last few months, we’re happy to say those days are now behind us. In this blog, we outline the new practices for uploading products on Vendor Central as well as editing content.
Adding products to Vendor Central via Bulk Product Submissions
The Bulk Product Submissions workflow of adding products to Vendor Central is the most intuitive and much easier to catch mistakes that you may regularly miss with a NIS or when adding a single product.
Even when adding a single product, I like to use the Bulk Product Submissions sheet instead of the online Add Product workflow. This method allows you to fill out a portion of the sheet and save it, giving you the option to come back to the sheet at a later date.
Here’s how to add a product using the Bulk Product Submissions workflow:
1. Log in to your Vendor Central account

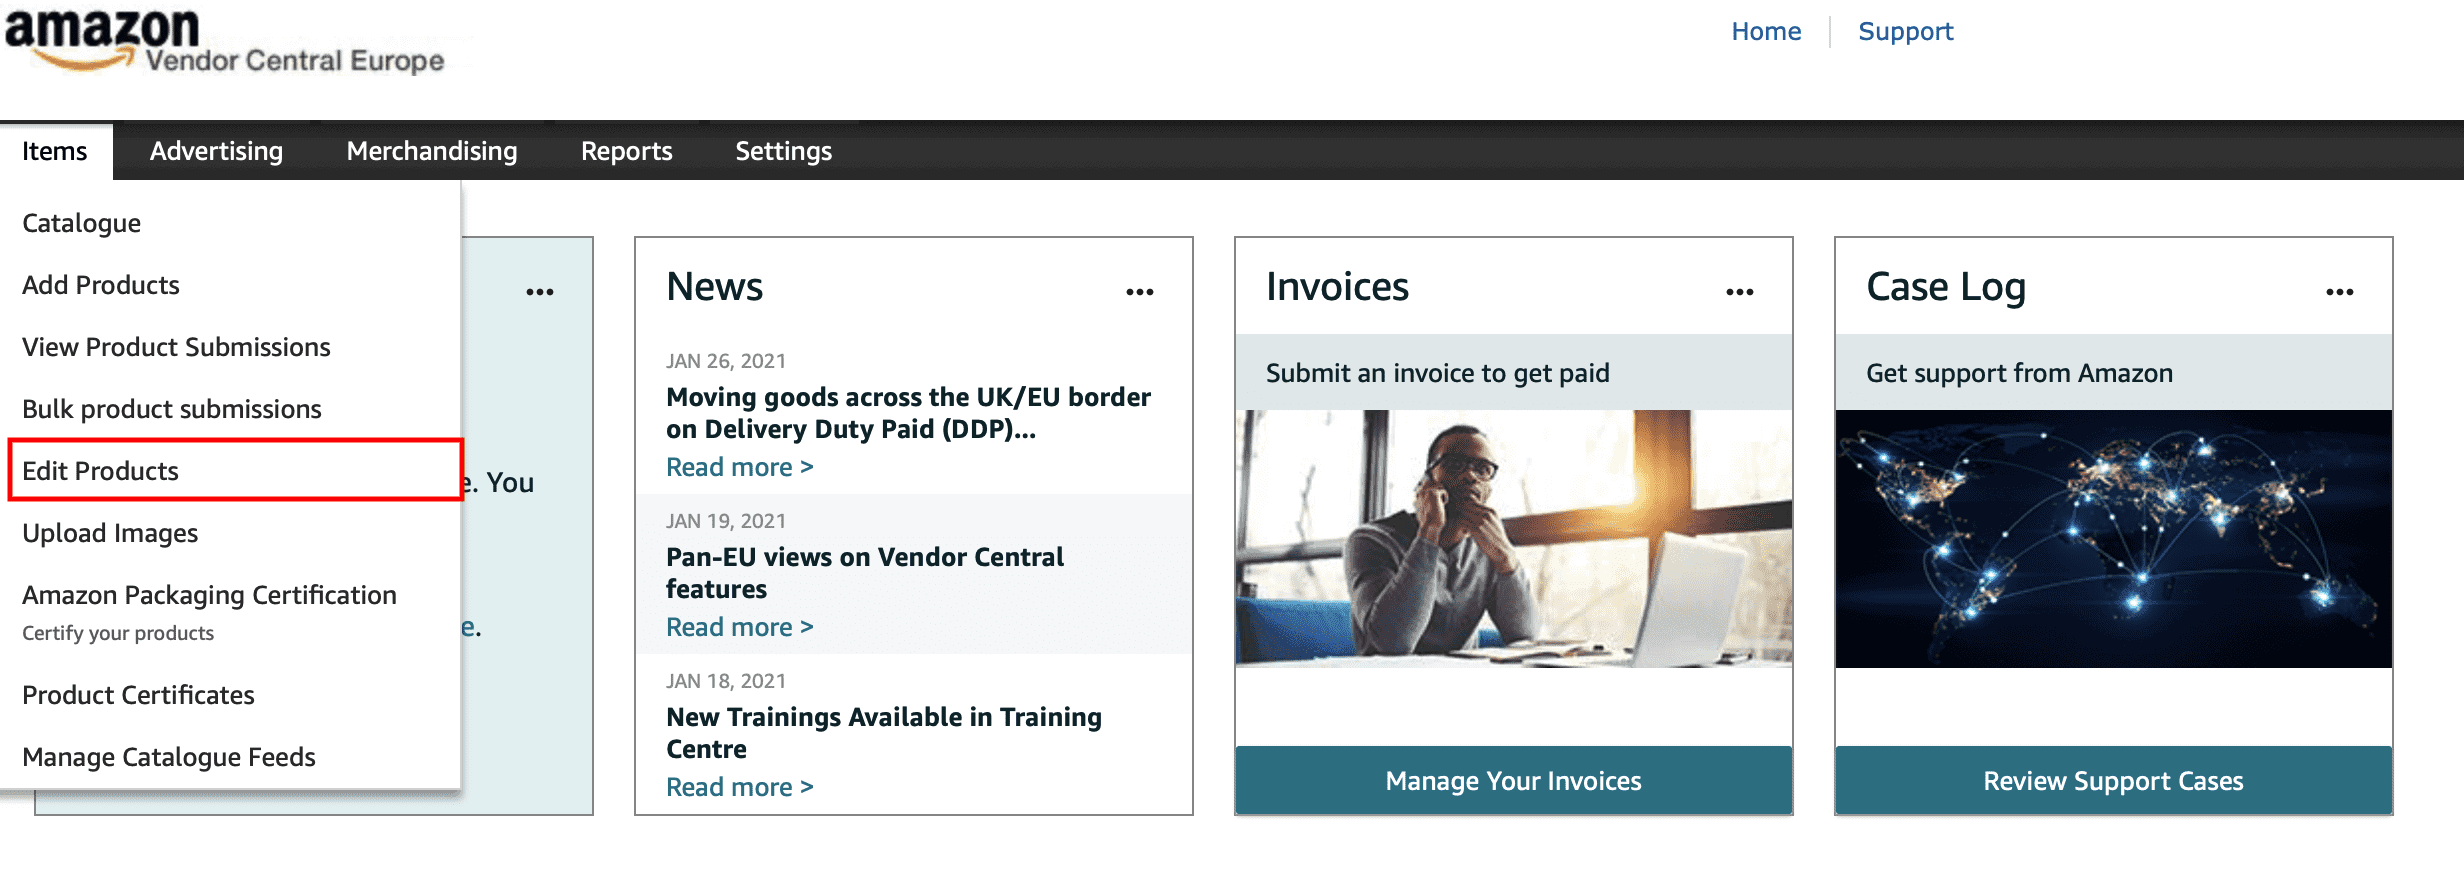
2. Hover over the Items column and click on "Add Products"

3. Select your category
Click on the Amazon yellow button that says "Select Product Type" and choose the closest category to your product. If you’re adding more than one type of product at one time, choose all the product types you need and then download the sheet.
4. Add new or existing products
Once you have all the product types selected. Enter the UPC/EANs for each product in the box below.
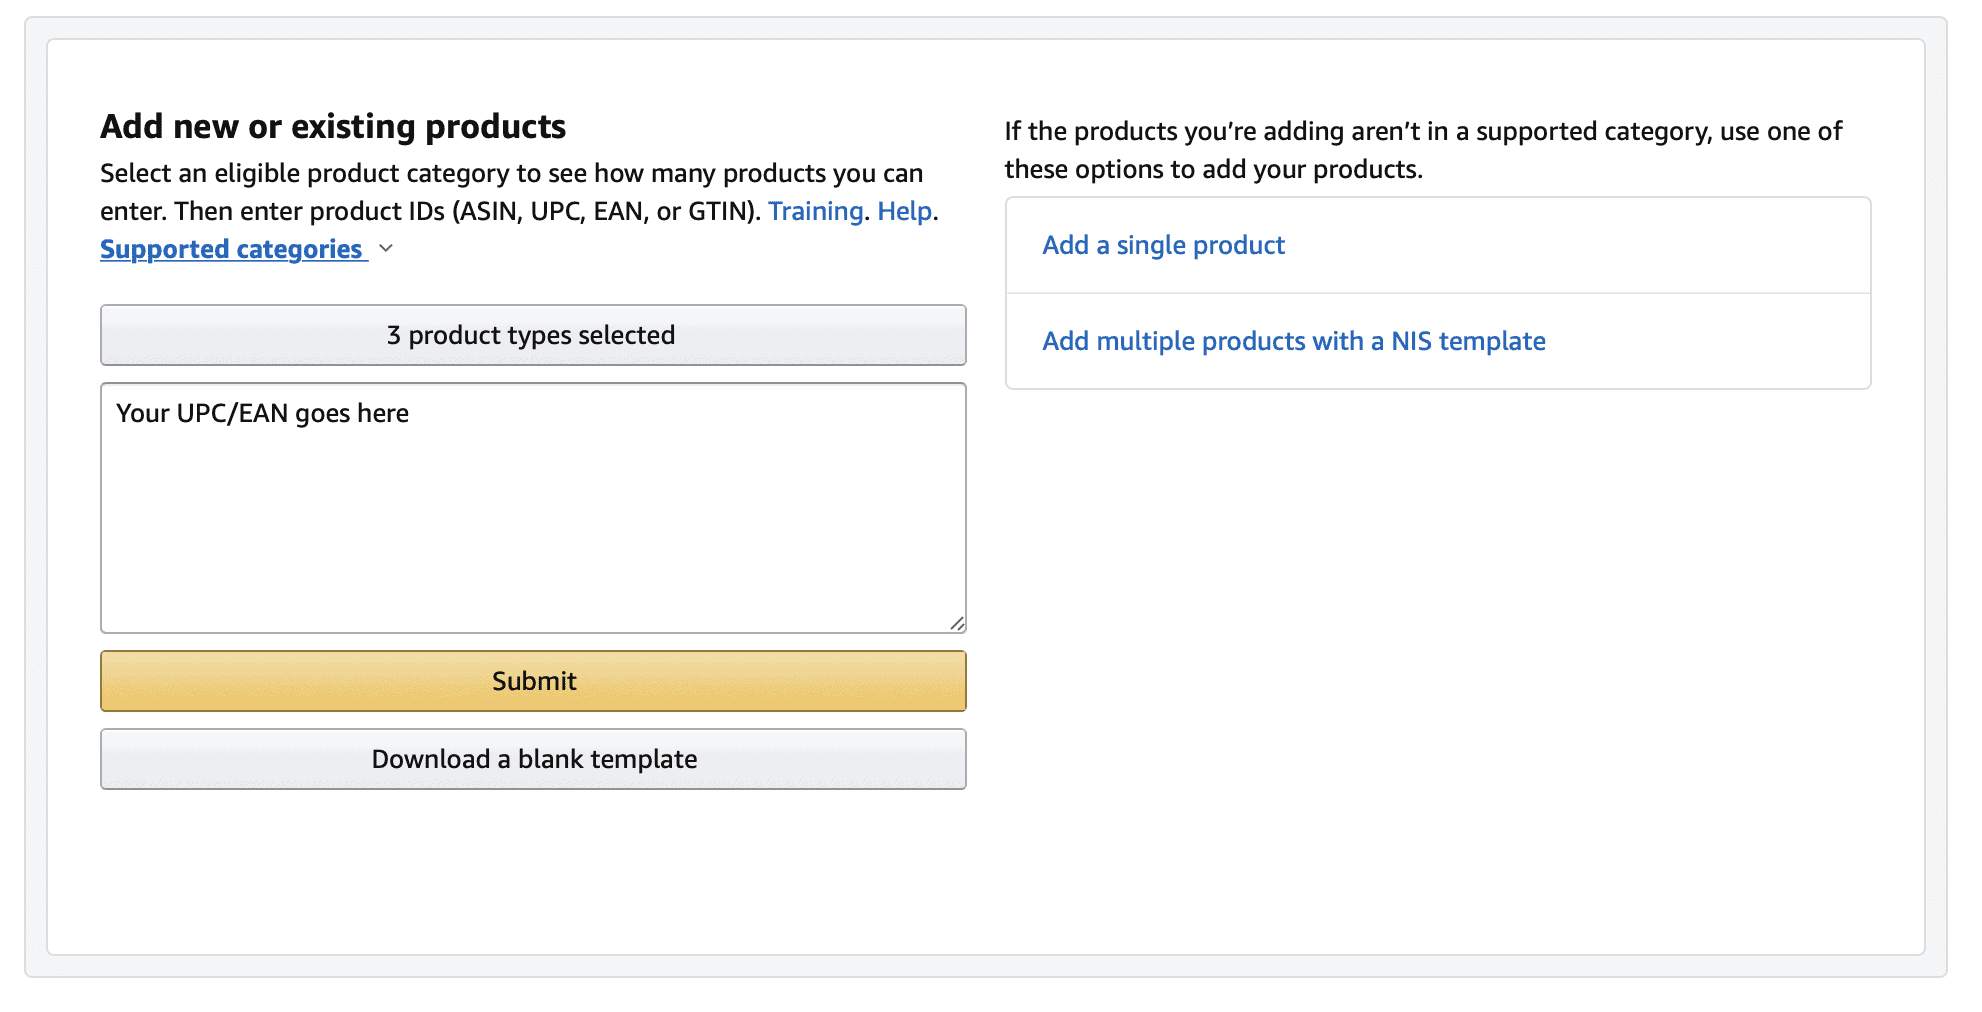

5. Submit your additions
Click "Submit" and you’ll be redirected to a page where you can see if your products are eligible to be added to your catalogue. In the top right corner of the page, click on the white button that says "Download Spreadsheet."

6. Fill in the spreadsheet
This is now the spreadsheet that you will your product details into and upload to Vendor Central. Notice the UPC/EAN and product category is already filled out for you due to Amazon pre-loading it using the above steps. The required fields will be outlined in red. These fields vary depending on the type of product you have selected.
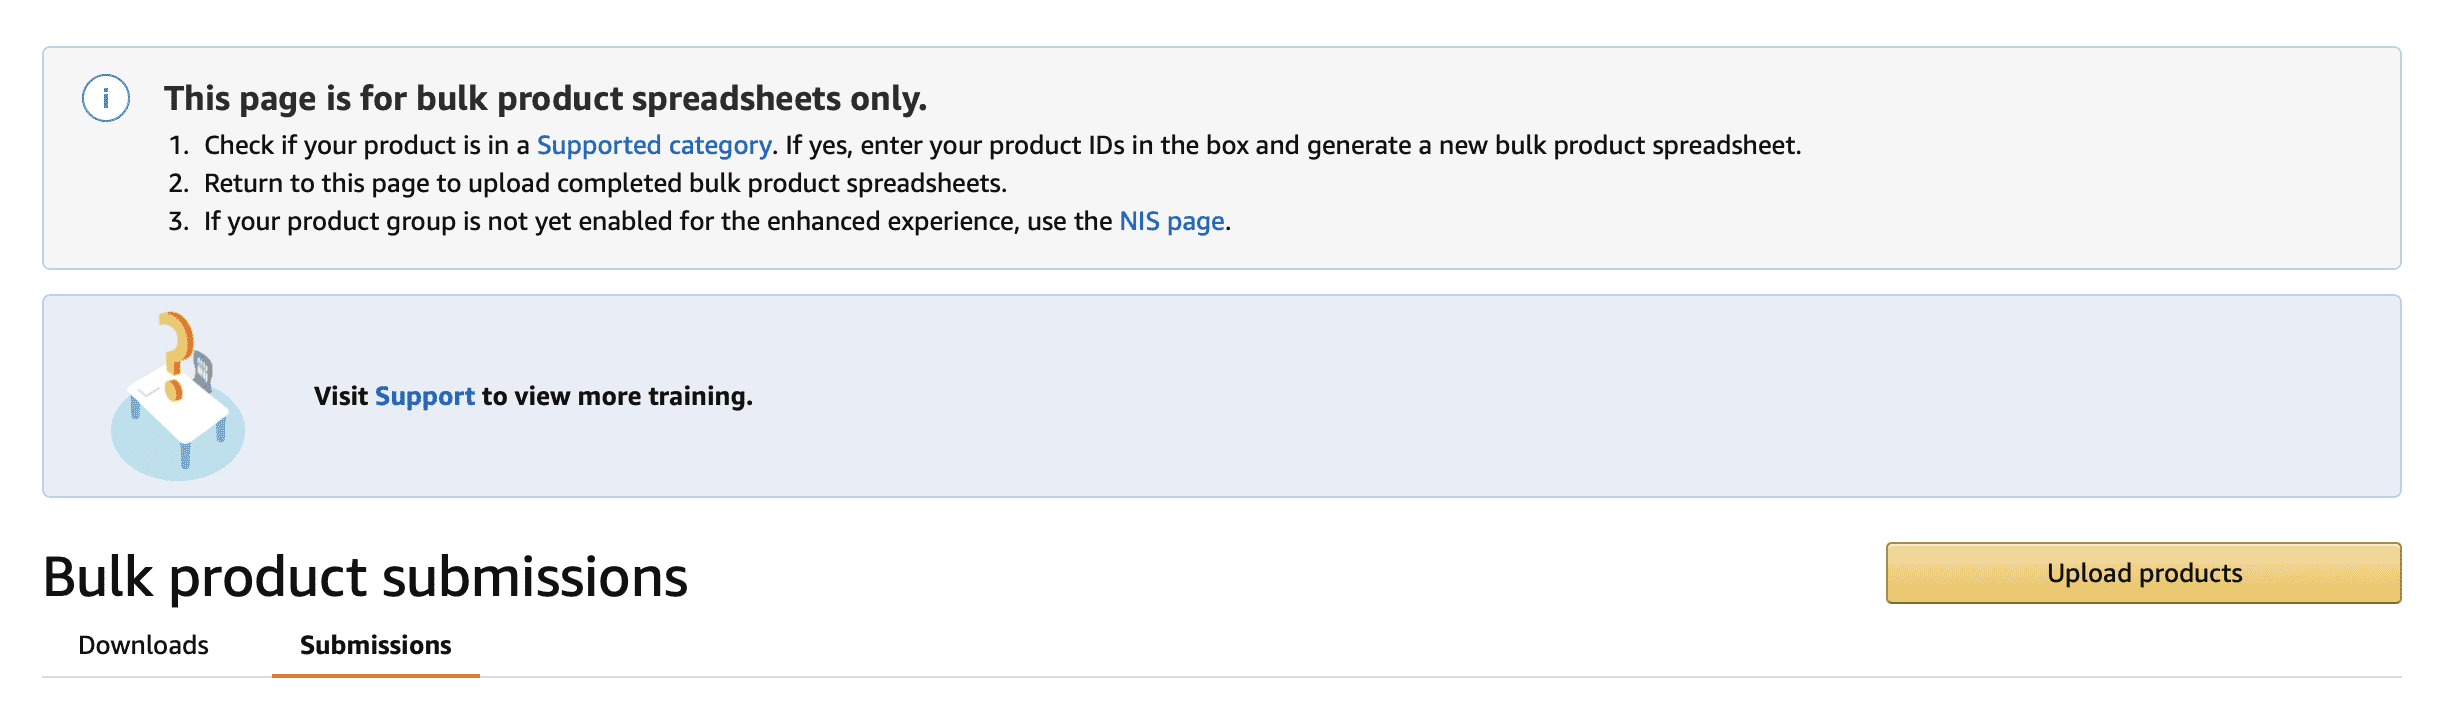
7. Upload your completed details
Once you have filled out the spreadsheet, it’s time to upload it to Vendor Central. From the main page in your Vendor Central account under the "Items" column, click the option "Bulk Product Submissions."
8. Ensure your sheet is accepted
Click the Amazon yellow button on the right side of the page labelled "Upload Products" and upload your spreadsheet. Now, depending on if you filled the spreadsheet out correctly, the submissions tab will tell you if your products have been accepted or if there are errors.
If there are errors, don't worry! Simply download the error sheet, where you’ll be told exactly which fields are not complying. You can edit this error sheet and re-upload it until your products have been accepted.

Note: some products may not appear right away even after they have been accepted. Check back within 24-48 hours or contact Vendor Support.
Editing Product Content on Vendor Central via spreadsheet method
One of the perks of the updates to the Vendor Central system is that you no longer need to save the NIS or upload spreadsheets in order to edit your content in the future.
Amazon now creates spreadsheets from your products with all the necessary fields that you have previously filled out, allowing you to make the edits you need, and then simply re-upload the sheet. Here is a step-by-step guide for editing some of the content of your products using an Amazon spreadsheet:
1. Navigate to "Edit Products"
From your main Vendor Central page go to the column "Items" and from the dropdown select "Edit Products."

2. Find the product
From this screen, you will locate the products you would like to edit and click the checkbox on the left-hand side. You can choose several at a time.
3. Bulk download
Once you’ve selected all the products you wish to edit, go back to the top of the catalogue and click the "Bulk Download" button. This will create a spreadsheet with the products you have selected.


4. Download the spreadsheet
Now you can edit the fields as you see fit. Once completed, save the spreadsheet somewhere you can easily access it.
5. Complete your Bulk Product Submissions
Finally, to re-upload this sheet, follow the instructions from step 7 above under “Adding Products to Vendor Central via Bulk Product Submissions”.
Need additional support?
One of my favourite things about this new upload/edit workflow is that you no longer need to keep NIS or spreadsheets after uploading if you want to make edits in the future. That saves you the headache of sifting through a big mess of excel files on your hard drive in order to change one bullet or a small part of your listing.
This new workflow implemented in Vendor Central would be great in Seller Central as well, but for now, at least we can enjoy the fact we no longer have to follow the dated upload/edit process that was previously much harder to navigate.
You can find details of this process in Vendor Central for both the NIS and the new workflow. If you have any questions related to product setup or need help with your Amazon account, please reach out. We’ll be happy to assist you and your Amazon business.